Painting your bathroom tiles is a brilliant way to breathe new life into your space without breaking the bank. At APMG Painting, we’ve helped countless Melbourne homeowners transform their bathroom tiles with a few simple coats of paint.
Why Paint Bathroom Tiles?
Painting your bathroom tiles offers a host of benefits that make it an attractive option for anyone looking to refresh their bathroom’s appearance:
- Cost-effective: Compared to ripping out and replacing tiles, painting is significantly more budget-friendly.
- Quick transformation: You can dramatically change the look of your bathroom in just a few days, rather than enduring weeks of messy renovations.
- Personalisation: Painting allows you to choose any colour or pattern you fancy, giving you the freedom to express your unique style.
- Minimal disruption: Unlike a full renovation, painting tiles causes minimal disruption to your daily routine.
- Increased property value: A fresh, modern bathroom can boost your home’s appeal and value.
Preparing Your Bathroom
Before you grab a paintbrush and start transforming your bathroom, it’s crucial to properly prepare. Thorough preparation will ensure a smoother process and a better finish.
Materials Needed
To paint your bathroom tiles effectively, you’ll need to gather the following materials:
- Tile cleaner
- Sugar soap
- Fine-grit sandpaper
- Tile primer
- Tile-specific paint
- Paint brushes and rollers
- Painter’s tape
- Drop cloths
- Protective gear (gloves, safety goggles, face mask)
- Sealant
Safety Considerations
Painting tiles isn’t just about aesthetics—it’s also about doing the job safely. Here are some key safety points to keep in mind:
- Ventilation: Ensure your bathroom is well-ventilated during the painting process. Open windows and use fans to circulate air and remove fumes.
- Protective gear: Always wear gloves, safety goggles, and a face mask to protect yourself from chemicals and dust.
- Electrical safety: Cover electrical outlets and switches with tape to protect them from paint and water.
- Slip prevention: Use non-slip drop cloths to prevent accidents on potentially slippery surfaces.
Remember, safety should always be your top priority. If you’re not confident about handling any aspect of the project safely, it’s best to call in professionals like APMG Painting. With our extensive experience and training, we ensure that every job is completed safely and to the highest standards.
Step-by-Step Guide
Now that you’re prepared, let’s dive into the step-by-step process of painting your bathroom tiles. Following these steps carefully will help you achieve a professional-looking finish that will stand the test of time.
1. Clean and Prepare the Tiles
The first and perhaps most crucial step is thoroughly cleaning and preparing your tiles. This step can make or break your project, so it’s worth taking the time to do it right. Begin by cleaning the tiles with a tile cleaner to remove any soap scum, mildew, or grime. Follow this with sugar soap to eliminate any residual grease or dirt.
After rinsing thoroughly, allow the tiles to dry completely. Inspect the tiles for any damage and repair cracked or chipped tiles before proceeding. Next, lightly sand the tiles with fine-grit sandpaper to create a slightly rough surface that helps the primer and paint adhere better.
Finally, wipe away any dust from sanding with a damp cloth and allow to dry. By following these steps, you’re creating the ideal surface for paint application, ensuring better adhesion and a longer-lasting finish.
2. Apply Primer
Applying primer is a crucial step that shouldn’t be skipped. It creates a surface that paint can easily adhere to and helps prevent peeling or chipping in the future. Choose a high-quality, tile-specific primer; at APMG Painting, we always use primers designed specifically for bathroom tiles to ensure the best results.
Before you start, use painter’s tape to protect areas you don’t want to paint, such as the bathtub, sink, or floor. Apply the primer using a roller for large areas and a brush for corners and edges, ensuring you’re working in a well-ventilated area. It’s better to apply multiple thin coats than one thick coat.
Allow the primer to dry completely between coats, which usually takes about 24 hours, but always check the manufacturer’s instructions. Once dry, lightly sand the surface again and wipe away any dust before moving on to painting.
3. Choose Your Paint
Selecting the right paint is crucial for achieving a durable and attractive finish on your bathroom tiles. Use a paint specifically formulated for tiles, as these are designed to withstand moisture and frequent cleaning.
Consider the finish you want; glossy finishes are easier to clean but show imperfections more readily, while matte finishes can give a more modern look.
Choose a colour that complements your bathroom’s overall design, remembering that lighter colours can make a small bathroom feel more spacious. Ensure the paint you choose is highly water-resistant to withstand the humid bathroom environment.
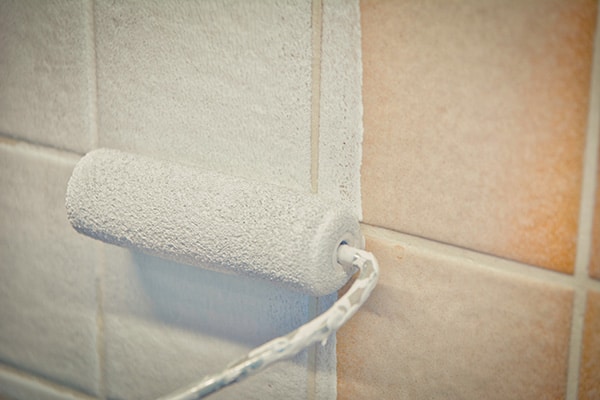
4. Painting Techniques
Now it’s time for the main event – painting your tiles!
- Start by stirring the paint thoroughly.
- Use a small brush to paint the grout lines first. This technique, known as ‘cutting in’, helps achieve a neater finish.
- For the tiles themselves, use a foam roller for the smoothest application. This will help minimise brush strokes and create an even finish.
- Apply thin, even coats. It’s better to apply multiple thin coats than one thick coat, as this reduces the risk of drips and uneven coverage.
- Allow each coat to dry completely before applying the next. This usually takes about 24 hours, but always refer to the paint manufacturer’s instructions.
- Sand lightly between coats for an ultra-smooth finish, being sure to wipe away any dust before applying the next coat.
Remember, patience is key when painting tiles. Rushing the process can lead to a less-than-professional finish. At APMG Painting, we take the time to ensure each coat is applied perfectly, resulting in a flawless finish that our customers love.
5. Applying Multiple Coats
For a professional-looking finish that will stand the test of time, multiple coats of paint are usually necessary. Most tile painting projects require at least two coats of paint, but you may need more depending on the original tile colour and the coverage of your chosen paint. Allow each coat to dry completely before applying the next. This typically takes about 24 hours, but can vary based on temperature and humidity.
6. Sealing the Paint
Once you’re happy with the paint coverage and it has fully dried, it’s time to seal your hard work. Choose a clear, water-resistant sealant designed for use in bathrooms.
Apply the sealant using a foam roller or brush, following the manufacturer’s instructions carefully. Pay special attention to areas that are likely to come into frequent contact with water, such as around the sink or shower. Then allow the sealant to dry completely. This often takes 24-48 hours.
Sealing your newly painted tiles is crucial for longevity, especially in a high-moisture environment like a bathroom.
Curing and Aftercare
Congratulations! You’ve finished painting your tiles. But before you start enjoying your newly refreshed bathroom, there are a few more things to consider:
- Curing time: While the paint may feel dry to the touch, it needs time to fully cure. This process can vary but we usually recommend waiting at least a week before cleaning your tiles or getting them wet.
- Gentle use: Once curing is complete, start using your bathroom again, but be gentle with the new surface for the first few weeks.
- Cleaning: When it’s time to clean, use non-abrasive, pH-neutral cleaners to protect your new paint job. Avoid harsh chemicals or abrasive scrubbers.
- Regular maintenance: Inspect your tiles regularly for any signs of wear or damage. Touching up small areas promptly can prevent larger issues down the line.
Common Mistakes to Avoid
Even with the best intentions, DIY painters can sometimes fall into common pitfalls. Here are some mistakes to watch out for:
- Skipping preparation: Proper cleaning and priming are crucial. Skipping these steps can lead to poor paint adhesion and a finish that doesn’t last.
- Using the wrong paint: Regular wall paint isn’t suitable for bathroom tiles. Always use tile-specific paint for the best results.
- Applying thick coats: It’s tempting to try and cover everything in one go, but thick coats can lead to drips, uneven coverage, and longer drying times.
- Inadequate ventilation: Proper airflow is essential not just for safety, but also for helping the paint dry correctly.
- Rushing the process: Allow adequate drying time between coats and before sealing. Patience truly is a virtue when it comes to painting tiles.
- Neglecting to seal: The sealant is your paint’s protection against moisture and wear. Don’t skip this crucial final step.
When to Call a Professional
While painting bathroom tiles can be a rewarding DIY project, there are times when it’s best to call in the professionals:
- If you’re dealing with a large area or intricate tile patterns.
- When you’re short on time or don’t have the patience for a multi-day project.
- If you have physical limitations that make painting difficult or unsafe.
- When you want to ensure a flawless, long-lasting finish.
- If you’re painting tiles in a rental property or for commercial purposes where professional standards are crucial.
APMG Painting can handle even the most challenging tile painting projects. Our expertise ensures a high-quality finish that will stand the test of time.
If you’re in Melbourne and looking for expert painters to transform your bathroom, don’t hesitate to reach out to APMG Painting. With our award-winning service and exceptional craftsmanship, we’re ready to help you achieve the bathroom of your dreams. Give us a call at 1300 97 97 40 for a free on-site inspection and quote.